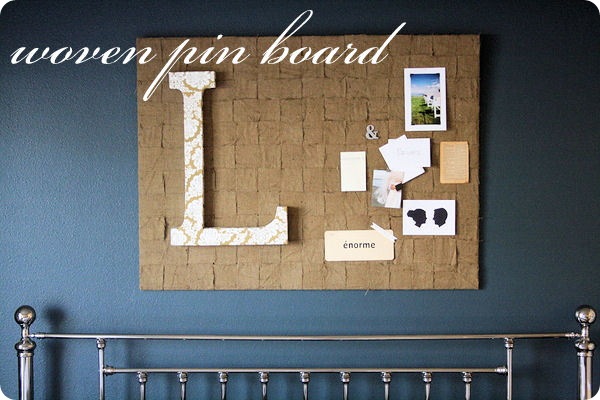
The tutorial for the woven pin board is great, though I ran into some issues and I'll give you my work around.
Cutting the burlap evenly is *really* important. I didn't use my fabric scissors on the burlap because I thought it would be bad for them...silly me. So I got some thin strips and some fat strips and it was tricky to weave them properly. I wound up trimming some of the fat parts of the strips to make weaving easier.

Making sure you have enough staples in your arsenal is also important and I probably wouldn't even mention it except that it took me three trips to the store to finally get the right type of staples so finishing my project took about 3 weeks. Oops.

Just hot glue the wood pieces on to a push pin and voila! you have a custom phrase that is also functional.

This is our engagement party invitation (well the back side) created by my now sister-in-law Denise. That picture is from my favorite place IN THE WORLD, the private beach outside of Gull Cottage on Tybee Island, Georgia.
Those wine corks and seashells are from our honeymoon and the subject of next week's Tutorial Tuesday (be on the lookout!). P.S. they are pushpins too.

And this is the boutonniere I made for my husband for our wedding, secured to the board with a wine cork pushpin.
DIY boutonniere Tutorial Tuesday in 2 weeks! (Now you're seeing why this week is a featured tutorial? :)

The monograms on our board were also made by me and they are super-easy but I'm not doing a tutorial on them. Here's a quick and dirty: get some throw-away foam from a craft store when they are restocking. Print out a large letter in your font of choice (I did 3 different fonts for our letters), trace on the foam. Cut out with an Xacto knife. Use Mod Podge and crumpled up tissue paper to cover the surface. Paint in your desired color. I also used glitter on the H but its optional. (I just love how the H looks like its covered in fluffy frosting...)
I loved how our board turned out and I can't wait to buy our wedding pictures so I can add a few to it.

Another note: Emily's hanging her board by ribbon DID NOT work for me. It could have just been that my ribbon was not great or the board didn't want to accept it. I wound up using a picture hanging kit that supports 50 pounds (wayyy unnecessary but let's just call it a factor of safety since it is hanging over our heads while we sleep) and that worked beautifully.
I like the result so much I made a smaller, less girlified version for my brother's birthday.

Also with the handmade scrabble tiles but a cardboard letter that I painted to look shadowboxy.
So that concludes the first-ever Tutorial Tuesday! Check back next week for DIY wine cork home accents!
Hi Natalie,
ReplyDeleteI just wanted to say hi and let you know that I came across your Etsy store and loved your stuff, so I've featured some of it on my blog, The Naturette. http://thenaturette.blogspot.com/2011/11/turkey-flowers.html
Have a great Thanksgiving :)